
Showing posts with label crafts. Show all posts
Showing posts with label crafts. Show all posts
Tuesday, January 11, 2011
The Official Household Disney Countdown
The Louagie Household Official Disney Countdown has begun. We are leaving 1 month from today (we check in 2 days before Claire turns 3, which makes her still FREE! Yay!), and to avoid the continual "How long until Disney?" questions, we made a paper chain to count down. We leave in the evening, so I put on 32 links, so the day they tear up the last one is the day we leave (since we're leaving in the evening). Plus, I used up some old scrapbook paper that was kicking around the basement. As the chain shrinks, I'll move it down the wall (though both girls would probably love to climb up to the ceiling to get to the links). Thanks to my friend Jennifer for the idea!


Thursday, March 4, 2010
Another Tote
Yes, I have a tote obsession right now. This one I made from a man's L T-shirt. The local thrift store has T-shirts for $.99 and they were 25% off. The lining fabric was from my stash. Total cost out of pocket right now for this tote - $.75 plus tax. Yay! And this is only because my dear husband was not willing to part with any of his Ohio State T-shirts for my project this time.

Cut a piece from the front & back of the shirt to the desired tote size. I cut 15" x 15" pieces to make a 13" x 13" x 3" finished tote. Let me say, however, that I really dislike working with the stretchiness of knit. I am going to have to get used to it and practice I guess.
I ironed medium-weight fusible interfacing to the front and back T-shirt tote pieces. It was a bit tricky and you can see I wrinkled the front a smidge in the middle of the logo. Grrr. Then I cut matching lining pieces from the other fabric - same dimensions. I ironed fusible fleece to those for padding, but I think next time I'll just use interfacing also - maybe some heavyweight so it's a bit stiffer.
I cut the pocket piece from a sleeve and the tote handles are the side seam areas that were left after cutting out the large pieces from the shirt. They're a bit short - I'm going to have to work on that next time. I didn't pad the handles for this one, I just used some interfacing inside them to help stiffen up the knit.

Overall, I'm fairly happy. I'm thinking that I need to cut up an old UT (that's University of Toledo, not University of Tennessee) shirt from college and make one for my alma matter.
If I get around to it this week (things are a bit crazy - my youngest has a surgery consult this morning during my oldest's ballet class, for example - I'm not looking forward to surgery on a barely 2 year old, even if it is for something routine like a hernia behind her belly button).
Well, I'm off to today's races. Hope you've been inspired to try making your own upcycled tote from these posts!

Cut a piece from the front & back of the shirt to the desired tote size. I cut 15" x 15" pieces to make a 13" x 13" x 3" finished tote. Let me say, however, that I really dislike working with the stretchiness of knit. I am going to have to get used to it and practice I guess.
I ironed medium-weight fusible interfacing to the front and back T-shirt tote pieces. It was a bit tricky and you can see I wrinkled the front a smidge in the middle of the logo. Grrr. Then I cut matching lining pieces from the other fabric - same dimensions. I ironed fusible fleece to those for padding, but I think next time I'll just use interfacing also - maybe some heavyweight so it's a bit stiffer.
I cut the pocket piece from a sleeve and the tote handles are the side seam areas that were left after cutting out the large pieces from the shirt. They're a bit short - I'm going to have to work on that next time. I didn't pad the handles for this one, I just used some interfacing inside them to help stiffen up the knit.

Overall, I'm fairly happy. I'm thinking that I need to cut up an old UT (that's University of Toledo, not University of Tennessee) shirt from college and make one for my alma matter.
If I get around to it this week (things are a bit crazy - my youngest has a surgery consult this morning during my oldest's ballet class, for example - I'm not looking forward to surgery on a barely 2 year old, even if it is for something routine like a hernia behind her belly button).
Well, I'm off to today's races. Hope you've been inspired to try making your own upcycled tote from these posts!
Tuesday, March 2, 2010
Upcycled Tote
Here's a tote I made last night. It started as a man's size L button down shirt (thank you to my husband Mark for his donation to this project) and some ancient quilting fabric handed down to me from my mom (only used about 3/4 yds of the 7 yds I have - more pink projects on the way I think!)

I basically just cut the shirt apart at the seams, cut the top yoke and collar off and then used the fabric to cut out the pieces of my tote like I would on regular fabric. I just made sure that the front piece of the tote had the buttons and front shirt pocket on it. I also used no-sew hem tape and ironed it in between the buttons on the front shirt placket so that it didn't gap and show the interfacing.

I ironed Pellon 978 fusible fleece to the gray shirt pieces to give it a bit of padding, and then on the pink lining pieces I just ironed on midweight fusible interfacing. The inside has two pockets - one that is about 9x9 (finished size) that holds a couple of diapers and travel wipes really well and another that is about 6x9 that holds small stuff like gum, cell phone, ipod, etc. The outside pocket of the bag is the pocket of the shirt, which I embellished with pink grosgrain ribbon (I ironed this one at the end with no-sew hem tape - next time I will sew it on before assembling the bag) and a faux bow.


The tote is modeled after the "Charm Party Tote" pattern from Quilts Illustrated, just for dimensions, basically. I think I'd honestly like the tote to be a bit taller and narrower so that more buttons show - I think I'll offset the buttons to the side of the tote if it's taller.
Not bad for a first attempt I think. Right now I'm on a kick of converting men's dress shirts into other things - girls peasant dresses, totes, and I'm thinking maybe even a shirt for myself sometime soon.
I'm linking this up to the "Get Your Craft On" day at Today's Creative Blog, "Tip Me Tuesday" at Tip Junkie, and Do It Yourself Day at A Soft Place to Land


I basically just cut the shirt apart at the seams, cut the top yoke and collar off and then used the fabric to cut out the pieces of my tote like I would on regular fabric. I just made sure that the front piece of the tote had the buttons and front shirt pocket on it. I also used no-sew hem tape and ironed it in between the buttons on the front shirt placket so that it didn't gap and show the interfacing.

I ironed Pellon 978 fusible fleece to the gray shirt pieces to give it a bit of padding, and then on the pink lining pieces I just ironed on midweight fusible interfacing. The inside has two pockets - one that is about 9x9 (finished size) that holds a couple of diapers and travel wipes really well and another that is about 6x9 that holds small stuff like gum, cell phone, ipod, etc. The outside pocket of the bag is the pocket of the shirt, which I embellished with pink grosgrain ribbon (I ironed this one at the end with no-sew hem tape - next time I will sew it on before assembling the bag) and a faux bow.


The tote is modeled after the "Charm Party Tote" pattern from Quilts Illustrated, just for dimensions, basically. I think I'd honestly like the tote to be a bit taller and narrower so that more buttons show - I think I'll offset the buttons to the side of the tote if it's taller.
Not bad for a first attempt I think. Right now I'm on a kick of converting men's dress shirts into other things - girls peasant dresses, totes, and I'm thinking maybe even a shirt for myself sometime soon.
I'm linking this up to the "Get Your Craft On" day at Today's Creative Blog, "Tip Me Tuesday" at Tip Junkie, and Do It Yourself Day at A Soft Place to Land
Here's what my girls did this morning - the box from our new bathroom vanity is now a house. Kate ate her breakfast in the house. Claire screamed that she couldn't also fit in the house at the same time. Sigh.

Tuesday, February 23, 2010
Almost Free Wall Art
While cruising the dollar bins at Michael's today (almost as good as cruising the dollar bins at Target) I ran across a cool chipboard phrase - imagine. Kate is in a very imaginative phase right now. She spent all morning talking to her imaginary friend Jenny on my old cell phone. Jenny couldn't come to Michael's with us because she had to go to "The Bunny Show", and then to her grandparents. Except Jenny forgot that her grandpa died. I kid you not, this all came out of Kate's mouth in the span of about 15 minutes. So her other imaginary friend Jessica came to the store with us, and I had to buckle her in using the middle seat belt and had to offer her a snack, etc.
Anyway, back to the post at hand. I knew I wanted to do something with the imagine word, so I snagged it - hey, it was only $1. At home, I found the perfect scrapbook paper background that will match the new kitchen colors (we are doing a mini kitchen makeover, more to come on that) which are creamy yellow, red and black. So I painted the word black and adhered it to the scrapbook paper (which I cut to fit a 8x10 frame I had on hand).

Total out of pocket cost now - $1. Score. You could create this yourself for approximately $7 if you didn't already have the scrapbook paper and frame on hand.
I think I'm going to link this up with Today's Creative Blog's "Get Your Craft On". You can find lots more cool ideas through the link below...
Anyway, back to the post at hand. I knew I wanted to do something with the imagine word, so I snagged it - hey, it was only $1. At home, I found the perfect scrapbook paper background that will match the new kitchen colors (we are doing a mini kitchen makeover, more to come on that) which are creamy yellow, red and black. So I painted the word black and adhered it to the scrapbook paper (which I cut to fit a 8x10 frame I had on hand).

Total out of pocket cost now - $1. Score. You could create this yourself for approximately $7 if you didn't already have the scrapbook paper and frame on hand.
I think I'm going to link this up with Today's Creative Blog's "Get Your Craft On". You can find lots more cool ideas through the link below...
Wednesday, February 17, 2010
Best Kid's Birthday Card Ever
My mom's close friend made this card at a handmade card workshop she went to and didn't know who to use it for since her kids are older, so my mom gave it to Claire for her birthday. I LOVE this card. So much so that I am on a quest to find a punch like this. I want to make 27 of these and give them for every birthday party my children attend.
I think it speaks for itself when you see it, and these pictures do not do it justice.


I think it speaks for itself when you see it, and these pictures do not do it justice.


Saturday, February 13, 2010
We Love a Good Party...
Today was the day that Kate has been looking forward too for weeks. She had DOUBLE Valentine Parties! (For the correct effect, pretend you are 5 and say this while jumping up and down excitedly.)
First, we had her preschool Valentine party. The wonderful mom that I am, I agreed to fill in for our room mom who couldn't make the party. However, it means I was running around at the last minute and completely forgot my camera at home. I hate with a passion when that happens. The party involved things such as ice cream sundaes, Valentine Bingo and a Model Magic Craft. Plus, I have to say kudos to my awesome friend Jen for corralling Claire during the party for me. And for her awesome Valentine box craft. I will post a photo Sunday of her awesome Valentine box craft, made from cereal boxes. I made super-cute heart lollipops from leftover candy canes, which I found at Skip to My Lou, here.
Then, we quickly cleaned up and headed to her friend Avery's Valentine Party, which was already in progress. Why is it that things always happen at the same time?? My super-amazing friend Tiffany over at Happy Day hosted. I believe there were some games before we came (I saw some heart-shaped bean bags on the floor - heart shaped. Really.) and we arrived just in time for a craft and lunch. Sandwiches and cheese cut into heart shapes and strawberries. Plus frost-your-own cupcakes for dessert. With red frosting. Tiffany is very brave!
Since I forgot my camera, some of my friends kindly sent their photos... here are some of the best.


First, we had her preschool Valentine party. The wonderful mom that I am, I agreed to fill in for our room mom who couldn't make the party. However, it means I was running around at the last minute and completely forgot my camera at home. I hate with a passion when that happens. The party involved things such as ice cream sundaes, Valentine Bingo and a Model Magic Craft. Plus, I have to say kudos to my awesome friend Jen for corralling Claire during the party for me. And for her awesome Valentine box craft. I will post a photo Sunday of her awesome Valentine box craft, made from cereal boxes. I made super-cute heart lollipops from leftover candy canes, which I found at Skip to My Lou, here.
Then, we quickly cleaned up and headed to her friend Avery's Valentine Party, which was already in progress. Why is it that things always happen at the same time?? My super-amazing friend Tiffany over at Happy Day hosted. I believe there were some games before we came (I saw some heart-shaped bean bags on the floor - heart shaped. Really.) and we arrived just in time for a craft and lunch. Sandwiches and cheese cut into heart shapes and strawberries. Plus frost-your-own cupcakes for dessert. With red frosting. Tiffany is very brave!
Since I forgot my camera, some of my friends kindly sent their photos... here are some of the best.

Kate and Avery - how adorable is this. Seriously. I love it.

Tyson and Claire - not a bad shot for trying to get 2 toddlers to cooperate for a photo. These two are two peas in a pod, I swear.

Check out Tiffany's awesome handmade Love banner over her fireplace, which I think she explains how she made on her blog. And those cute preschoolers.

Kate frosting her own red cupcake. Which she then refused to eat. Go figure. I am such a good mom that I forced myself to eat it for her. :)
Tuesday, February 9, 2010
Updated Kitchen Work Station
We have a built-in desk/work station in our kitchen. It's very handy and quite annoying at the same time. Short of ripping out the entire desk and putting in a better cabinet, I organized and updated the desk this past weekend. Here is the before image:


This really isn't that bad, either. I'm kind of loathe to admit that, but this is definitely a "hotspot" and gets cluttered fast. Lighting fast.
Well, in the hopes of cutting some of that clutter, and short of ripping out the cabinet and desktop and putting in a cabinet that is actually useful (ie - one that is all drawers instead of a super-annoying base cupboard with no dividers in it), I decided to make the back wall under the shelf a magnetic chalkboard, courtesy of some magnetic paint and chalkboard paint.
I took the bottom shelf down and taped across the line that was still on the wall from when we hung the shelf last year. Then I opened the magnetic paint, which I bought about 2 years ago and hadn't gotten around to using. The can actually recommends on the side of it having it mixed in the paint department machine - haven't mixed this can by hand, I heartily concur with the directions of having the paint dept do it. It took a lot of stirring. A LOT. It also took a LOT of coats. 5 to be exact. The can said 3. I recommend 5, or even 6 if you'd like a magnet to actually hold up a piece of paper or two. I did 5 coats and most magnets will hold up 2 sheets of paper on the wall.
I let the magnetic paint dry for a day, then topcoated with chalkboard paint (you could easily topcoat with a couple coats of paint to match your walls for a "hidden" magnet wall).
Here's the finished product, decluttered (mostly) and organized. I'm pretty happy with it, and the girls are currently loving it - Kate plays tic-tac-toe on the wall almost daily.

Thursday, February 4, 2010
Applique T-shirt tutorial
This is a documented first attempt at applique. It's not perfect, but overall I'm very happy with it and learned a few things that I need to try a bit different for next time. Thankfully Kate isn't picky, and declared that she "LOVED IT!!!" and the matching skirt I whipped up when she saw them this morning and hasn't taken them off since except for ballet class.
Here is what you need for this project...


Trace or Draw the image that you want onto your cardstock, then cut it out. If you are drawing, you could draw directly onto the papery side of the Wonder-Under. It's your choice. I made a simple flower design.

Step 2
Trace your cardstock/cardboard image onto the papery-side of a piece of Wonder-Under. This is hard to see in the photo below - sorry!

Step 3
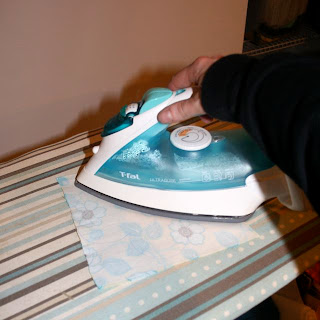
Iron your piece of Wonder Under to the wrong side of the fabric of your choice, following the directions on the package.
Step 4
Cut out the fabric image around the lines you traced on the Wonder Under.
Step 5
Carefully remove the paper backing from the fabric image.
Step 6
Position the applique on the T-shirt and iron on following the directions on the Wonder Under.
Step 7
Set your sewing machine to it's zigzag stitch. Shorten the stitch length down a bunch. On my machine, I chose a stitch width (how big your zigzag is, basically) of 6.0 (on a 7.0 scale) and a stitch length (how far apart the zigzags are) of 0.3 when standard length was 1.4. Zigzag back and forth over the edge of the entire applique. This ensures the edges won't fray, and gives it a bit of an "outline" effect. This was the most challenging part, as the knit of the T-shirt wants to stretch some as you're maneuvering it through your machine. I think this is one of those "practice makes perfect" steps. Alternately, you could skip zig-zagging and just straight stitch around the edge of the applique, but the edges of the applique may fray a bit over washings. It's your choice. Unless you are hand-sewing, in which case for the sake of your own sanity you just want to straight-stitch as close to the edge as you can.

Step 8
TA DA! You are finished!

Overall, I am pretty happy with the finished result. The T-shirt puckered up in a few places around the edges of the applique where it stretched as I was sewing. However, for the cost of the material (both were in the clearance bin at Joann's last month for $2 a yard) and giving new life to a T-shirt that had a stain, I give this project 2 thumbs up.
My suggestion is to try something similar for your first time - see if you can find an old T-shirt of your child's that has a stain or a tear or something and see if you can breathe new life into it with an applique. Chances are it will look better when you're done than it did before!
The coordinating skirt is simply a basic gathered skirt that I sewed a contrasting strip on the bottom of. Sew the strip on, sew the side seams together, hem the bottom, put a casing for elastic on the top. If you want step by step directions for this I can give them, but there are a bunch of free tutorials on a basic gathered skirt already out there. I will post a picture as soon as I can get Kate to stop twirling around in it!!!
**Update** - since posting this, I've discovered that it greatly helps to use a mid-weight stabilizer on the underside of the T-shirt below the applique. I use the "sew-on" kind and then tear away the excess. It definitely helps stop the puckering/stretching of the T-shirt.
Here is what you need for this project...


- 1 pre-washed T-shirt (I used one of Kate's she already had which had a stain on it - I love getting new life out of old things)
- Fabric of your choice in a piece large enough to cut the image of your choice out of - pre-wash the fabric
- Cardstock or cardboard (like old cereal boxes or the like) to make your template from
- "Wonder Under" or "Heat N Bond" - this needs to be in a big sheet and not the skinny "no-sew" hem tape. I bought mine at Joann's (with a coupon, of course) and it was in the notions section near the interfacing. I think it may also come on a bolt (Pellon is the manufacturer), but I'm not sure. If you buy a package, keep the package, as it has has the directions for use on it.
- Iron
- Coordinating thread
- Sewing machine (you could do it by hand if you are more patient than I am)
Trace or Draw the image that you want onto your cardstock, then cut it out. If you are drawing, you could draw directly onto the papery side of the Wonder-Under. It's your choice. I made a simple flower design.

Step 2
Trace your cardstock/cardboard image onto the papery-side of a piece of Wonder-Under. This is hard to see in the photo below - sorry!

Step 3
Iron your piece of Wonder Under to the wrong side of the fabric of your choice, following the directions on the package.

Step 4
Cut out the fabric image around the lines you traced on the Wonder Under.
Step 5
Carefully remove the paper backing from the fabric image.
Step 6
Position the applique on the T-shirt and iron on following the directions on the Wonder Under.
Step 7
Set your sewing machine to it's zigzag stitch. Shorten the stitch length down a bunch. On my machine, I chose a stitch width (how big your zigzag is, basically) of 6.0 (on a 7.0 scale) and a stitch length (how far apart the zigzags are) of 0.3 when standard length was 1.4. Zigzag back and forth over the edge of the entire applique. This ensures the edges won't fray, and gives it a bit of an "outline" effect. This was the most challenging part, as the knit of the T-shirt wants to stretch some as you're maneuvering it through your machine. I think this is one of those "practice makes perfect" steps. Alternately, you could skip zig-zagging and just straight stitch around the edge of the applique, but the edges of the applique may fray a bit over washings. It's your choice. Unless you are hand-sewing, in which case for the sake of your own sanity you just want to straight-stitch as close to the edge as you can.

Step 8
TA DA! You are finished!

Overall, I am pretty happy with the finished result. The T-shirt puckered up in a few places around the edges of the applique where it stretched as I was sewing. However, for the cost of the material (both were in the clearance bin at Joann's last month for $2 a yard) and giving new life to a T-shirt that had a stain, I give this project 2 thumbs up.
My suggestion is to try something similar for your first time - see if you can find an old T-shirt of your child's that has a stain or a tear or something and see if you can breathe new life into it with an applique. Chances are it will look better when you're done than it did before!
The coordinating skirt is simply a basic gathered skirt that I sewed a contrasting strip on the bottom of. Sew the strip on, sew the side seams together, hem the bottom, put a casing for elastic on the top. If you want step by step directions for this I can give them, but there are a bunch of free tutorials on a basic gathered skirt already out there. I will post a picture as soon as I can get Kate to stop twirling around in it!!!
**Update** - since posting this, I've discovered that it greatly helps to use a mid-weight stabilizer on the underside of the T-shirt below the applique. I use the "sew-on" kind and then tear away the excess. It definitely helps stop the puckering/stretching of the T-shirt.
Thursday, July 16, 2009
Super Cute gift idea!

I was looking on Etsy and found this SUPER cute listing for washcloths made to look like cupcakes! This would make a really cute shower gift. I'm sure you could probably make your own if you're craftily-inclined. If not, buy them from the link below as they're very reasonably priced for a gift and they're super cute!
Subscribe to:
Posts (Atom)
LinkWithin
