Here is what you need for this project...
- 1 pre-washed T-shirt (I used one of Kate's she already had which had a stain on it - I love getting new life out of old things)
- Fabric of your choice in a piece large enough to cut the image of your choice out of - pre-wash the fabric
- Cardstock or cardboard (like old cereal boxes or the like) to make your template from
- "Wonder Under" or "Heat N Bond" - this needs to be in a big sheet and not the skinny "no-sew" hem tape. I bought mine at Joann's (with a coupon, of course) and it was in the notions section near the interfacing. I think it may also come on a bolt (Pellon is the manufacturer), but I'm not sure. If you buy a package, keep the package, as it has has the directions for use on it.
- Iron
- Coordinating thread
- Sewing machine (you could do it by hand if you are more patient than I am)
Trace or Draw the image that you want onto your cardstock, then cut it out. If you are drawing, you could draw directly onto the papery side of the Wonder-Under. It's your choice. I made a simple flower design.
Step 2
Trace your cardstock/cardboard image onto the papery-side of a piece of Wonder-Under. This is hard to see in the photo below - sorry!
Step 3
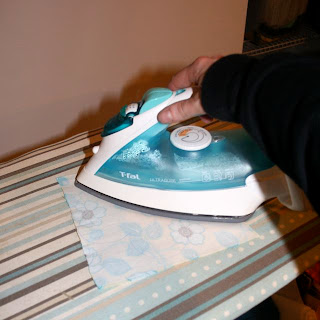
Iron your piece of Wonder Under to the wrong side of the fabric of your choice, following the directions on the package.
Step 4
Cut out the fabric image around the lines you traced on the Wonder Under.
Step 5
Carefully remove the paper backing from the fabric image.
Step 6
Position the applique on the T-shirt and iron on following the directions on the Wonder Under.
Step 7
Set your sewing machine to it's zigzag stitch. Shorten the stitch length down a bunch. On my machine, I chose a stitch width (how big your zigzag is, basically) of 6.0 (on a 7.0 scale) and a stitch length (how far apart the zigzags are) of 0.3 when standard length was 1.4. Zigzag back and forth over the edge of the entire applique. This ensures the edges won't fray, and gives it a bit of an "outline" effect. This was the most challenging part, as the knit of the T-shirt wants to stretch some as you're maneuvering it through your machine. I think this is one of those "practice makes perfect" steps. Alternately, you could skip zig-zagging and just straight stitch around the edge of the applique, but the edges of the applique may fray a bit over washings. It's your choice. Unless you are hand-sewing, in which case for the sake of your own sanity you just want to straight-stitch as close to the edge as you can.
Step 8
TA DA! You are finished!
Overall, I am pretty happy with the finished result. The T-shirt puckered up in a few places around the edges of the applique where it stretched as I was sewing. However, for the cost of the material (both were in the clearance bin at Joann's last month for $2 a yard) and giving new life to a T-shirt that had a stain, I give this project 2 thumbs up.
My suggestion is to try something similar for your first time - see if you can find an old T-shirt of your child's that has a stain or a tear or something and see if you can breathe new life into it with an applique. Chances are it will look better when you're done than it did before!
The coordinating skirt is simply a basic gathered skirt that I sewed a contrasting strip on the bottom of. Sew the strip on, sew the side seams together, hem the bottom, put a casing for elastic on the top. If you want step by step directions for this I can give them, but there are a bunch of free tutorials on a basic gathered skirt already out there. I will post a picture as soon as I can get Kate to stop twirling around in it!!!
**Update** - since posting this, I've discovered that it greatly helps to use a mid-weight stabilizer on the underside of the T-shirt below the applique. I use the "sew-on" kind and then tear away the excess. It definitely helps stop the puckering/stretching of the T-shirt.


That is so adorable! LOVE the fabric you used for the flower! Too cute.
ReplyDelete